
Console Planning Guide · Free, no form required
You’ve been handed a control room project. Here’s how to start.
Your organization has tasked you with a new control room or call center — or the renovation of an existing one. You don’t have to be an architect, engineer, or interior designer to get this going. We’re here to make this happen. Here are some tips to get started.
How to Use This Guide

01
Answer what you can
Work through the five sections below. Blanks are fine — “not sure yet” is a perfectly good answer.

02
Sketch the room
Graph paper, a pencil, and a tape measure. Wall lengths, doors, and where each position should go.

03
Send it to us
We turn it into a scaled design drawing and color renderings, so you can see the room before anything is built.
The Planning Worksheet
Five sections. Everything we need to design your room.
This is the same worksheet we use on every console project. Gather what you can — we’ll fill in the rest together.

SECTION I
Space dimensions

SECTION II
Console stations

SECTION III
Display & equipment

SECTION IV
Style preferences

SECTION V
Delivery

Section I
Overall Space Dimensions
Start with the room itself. A tape measure and a sheet of graph paper are all you need — a sketch with accurate wall lengths is enough for us to design from.
Room dimensions
Measure every wall
Exact lengths, wall to wall. Mark doors and which way they swing.
Note any obstructions
Columns, overhead beams, soffits, windows, HVAC returns — anything a console has to work around.
Provide a floor plan if one is available
Architectural plans, a fire-escape map, or a phone photo of a plan all help.
Mark where consoles should go
The desired location and orientation of each console or operator position.
Note power drop locations
Where power and data come into the room today — floor, wall, or ceiling.
Does the room have raised tile flooring?
New
Raised access floors change how power and data reach each console, so we plan for it from the start.
Note the location of video walls, if applicable
Sightlines from every seat to the wall drive how consoles are angled.

Section II
Individual Console Station Dimensions
Next, think about a single operator position — its shape, its depth, and whether it moves.
Each position
Desired shape
Straight, corner, curved, or something else. A quick drawing is the easiest way to show us.
Preferred work surface depth
How much desk space in front of the operator, before the monitors.
Most common work surface depths
24″
24″ work surface
30″ overall
30″
30″ work surface
36″ overall
36″
36″ work surface
42″ overall
Overall depth includes the rear frame, cable channel, and monitor mounting space behind the work surface.
Fixed height or adjustable height?
Adjustable-height consoles give operators sit/stand capability through a long shift.

Section III
Display & Equipment Requirements
Everything that has to live on, in, or under the console. Model numbers are best, but rough sizes are fine.
Monitors
How many, what size or model, where, and how stacked?
For example: four 27″ across on one row, or two rows of three.
CPUs
How many, what dimensions or model, and where?

Good to know: CPUs and other hardware can go in a mini server cabinet, or we can try to house them within the console frame itself, depending on the specifics.
UPS
How many, what dimensions or model, and where?
Switch boxes / KVM
How many, what dimensions or model, and where?
Personal storage
What kind, how many, and where is the ideal placement?
Most common are box/box/file or file/file pedestals.
Other equipment
Anything else to accommodate?
Radio equipment, printers, phones, turrets — if it sits at the console, list it.

Section IV
Style Preferences
The finishing details. You don’t need answers for all of these yet — many choices depend on the console series you pick.
Monitor mounts
Slatwall, or surface/track mounting?
Slatwall hangs monitors and accessories from a panel behind the work surface; surface or track mounts clamp to the desktop.
Pop-up outlets
How many, and where?
Most common is 2 AC and 2 USB ports per pop-up.
Finishes
Edging
Laminate color
Steel frame color
Good to know: Edging, laminate, and frame color choices are provided based on the console series you select — we’ll send options once the series is chosen.

Section V
Delivery
The step that surprises people most. Consoles arrive on pallets, so the path from the truck to the room matters.
Location
Is there a receiving dock or forklift on site?
Inside delivery
Are stairs involved?
Note doorway widths and elevator dimensions
And anything else that could make pallet delivery problematic — tight corners, security checkpoints, or delivery-hour restrictions.
From Sketch to Design to Rendering
Here’s what happens after you send us your sketch.
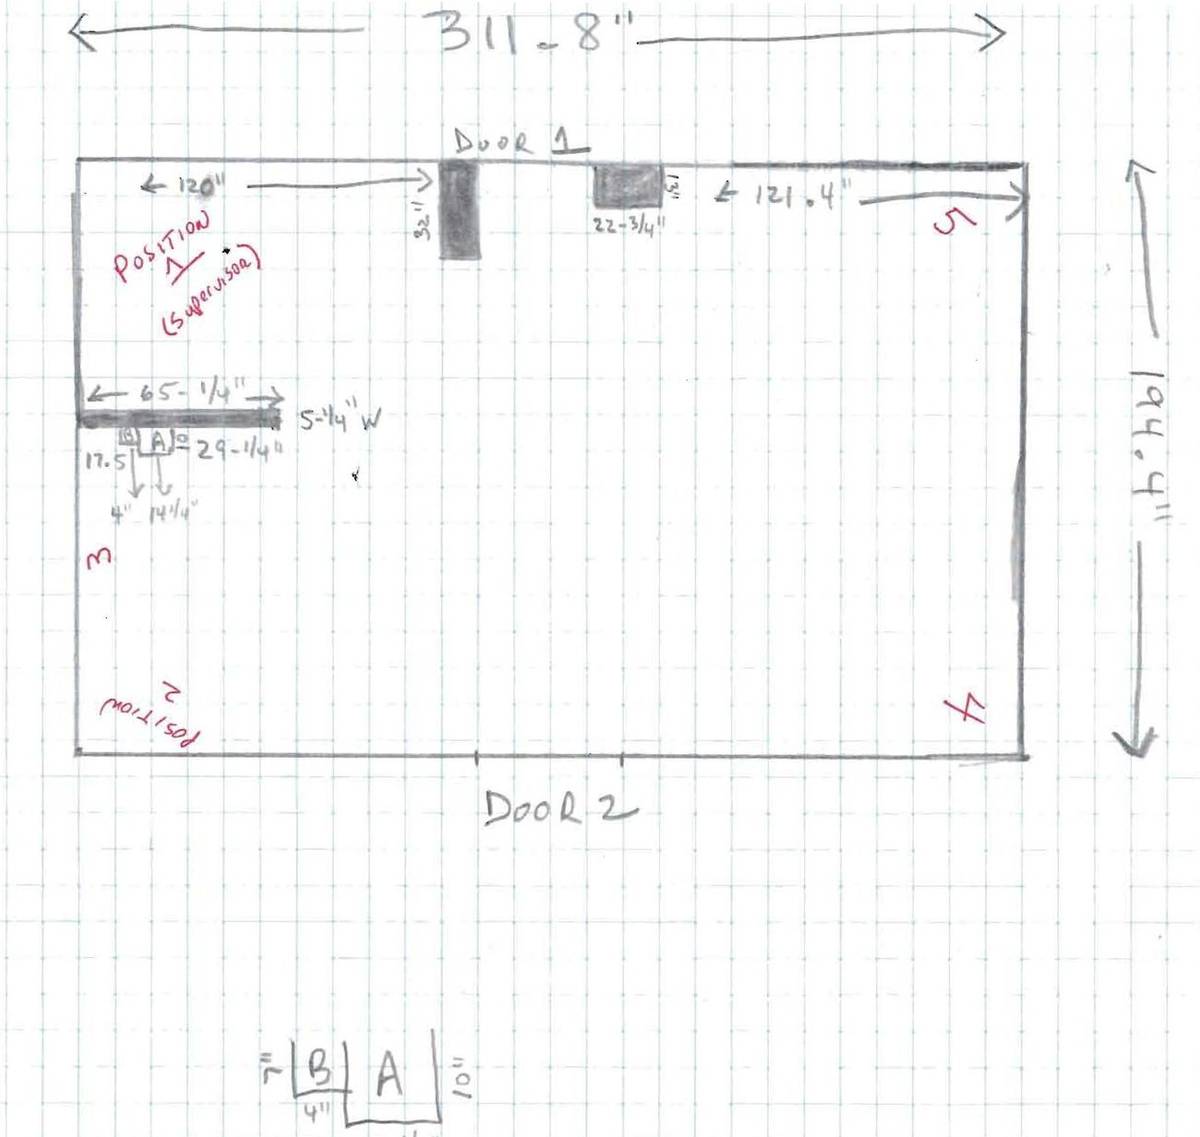
A real project: a 911 dispatch and supervisor console room. It started as a pencil sketch on graph paper.

Step 1
Your hand-drawn sketch
Wall lengths, doors, and five numbered positions, penciled on graph paper. No software, no scale drawing, no design background.


Step 2
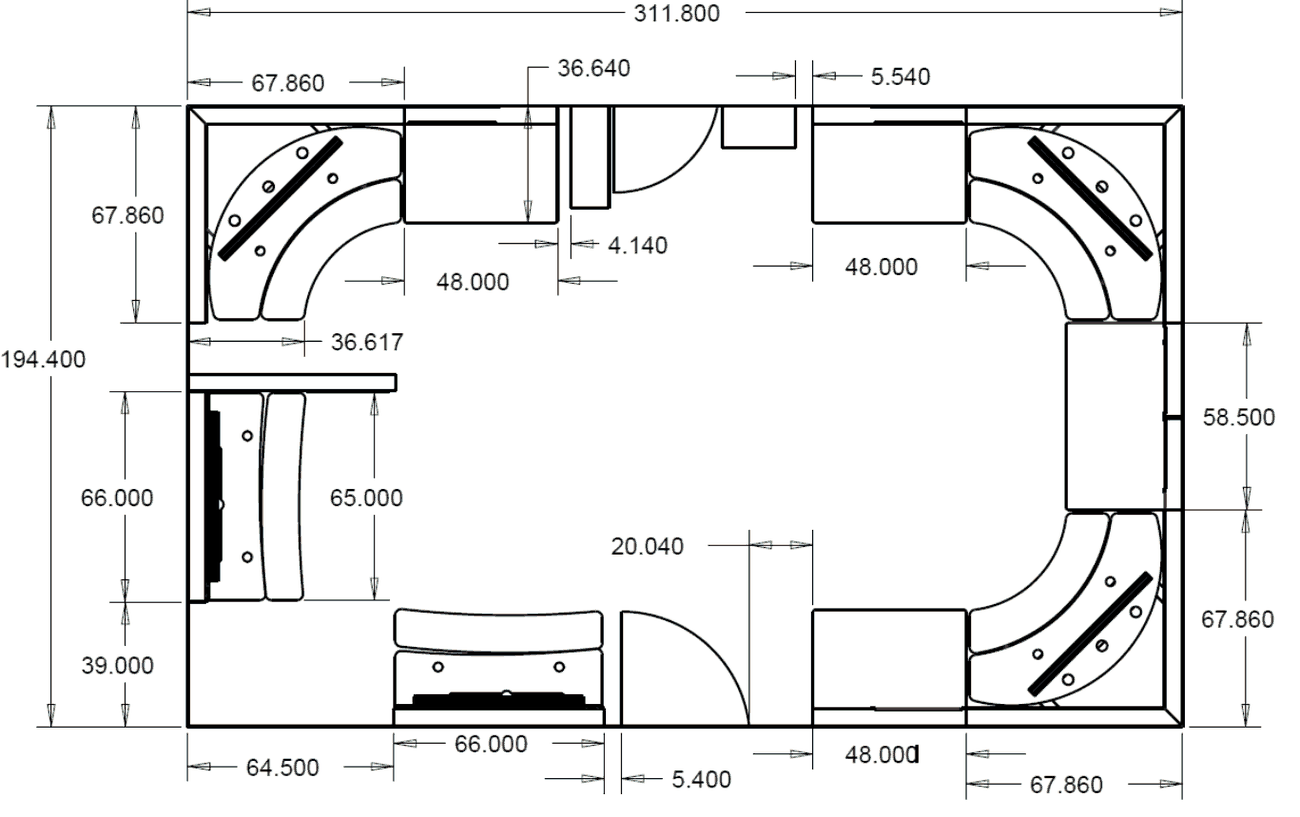
The dimensional design drawing
We turn the sketch into a scaled design drawing with every console, gap, and clearance dimensioned — usually back within 48–72 hours of having your project details.

Step 3
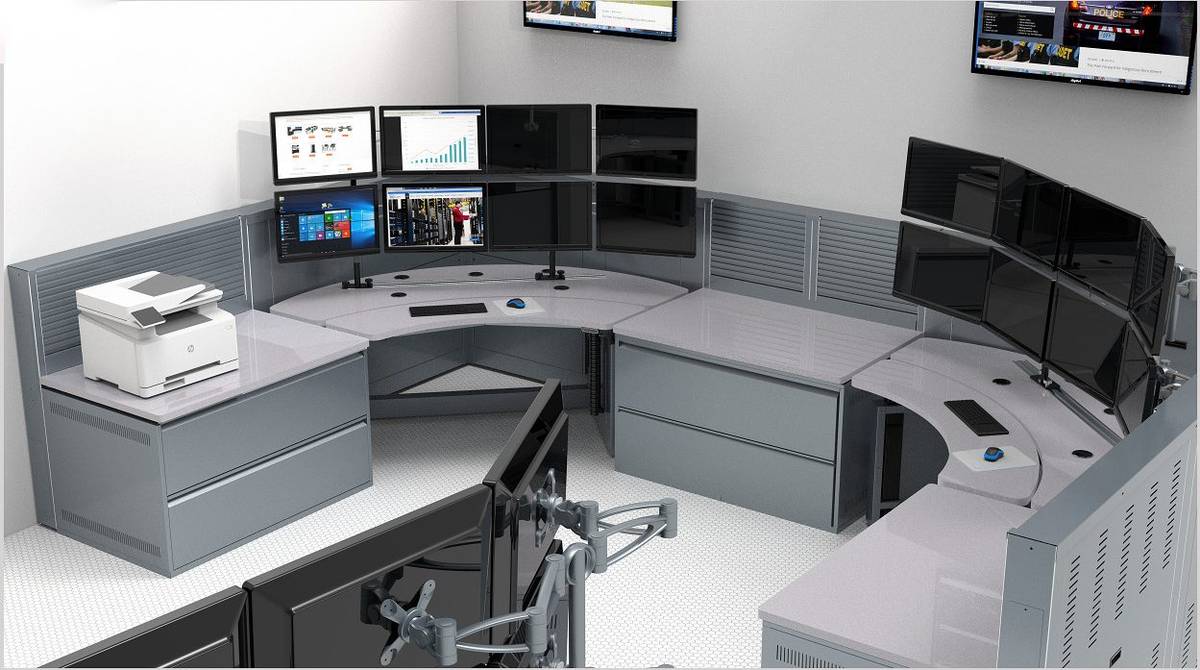
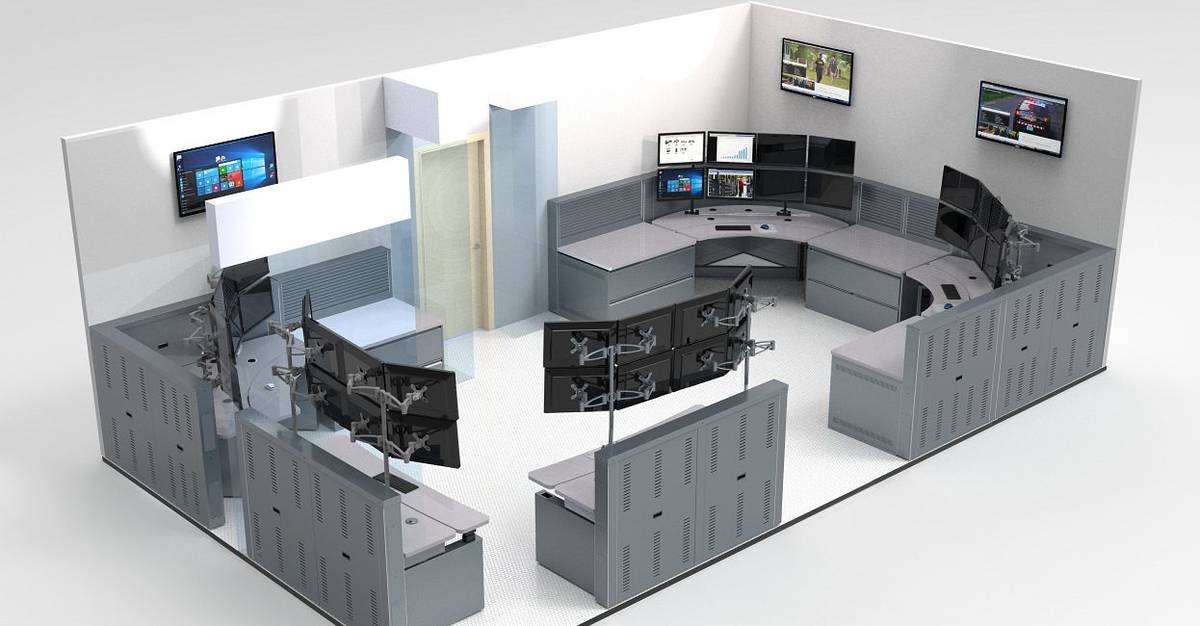
Full-color renderings
Then you see the finished room — monitors, storage, and finishes in place — before anything is built or bought.
Send us what you have. We’ll take it from there.
A sketch, a few answers, and a phone call are enough to get started. GSA Schedule pricing available for qualifying agencies.